If you are having trouble changing the admin, we are here to help you with how to change administrator on Windows 11 & Windows 10. Windows 11 allows you to have several local accounts set up on one PC, which has allowed locals to have separate workspaces. You can have two main account types set up on your computer, including administrator and standard. Likewise, both user account types have different sets of privileges. You can change to administrator or standard accounts in Windows 11.
You will simply not want to use standard accounts for your employees. Standard account holders cannot install any software or hardware driver on their computer. The only thing they can change is their desktop background. Imagine how much time it will take if all the computers in your office are set up with standard accounts? The answer – an awful lot of wasted time!
How to Change Administrator on Windows 11?
You can change user account types in many ways in Windows 11. We are going to use an old and simple method to do so by using Control Panel and Settings app. This method will work the same on Windows 10, Windows 7 and Windows 8.1 PCs.
How to Change User Account Using Settings App in Windows 11?
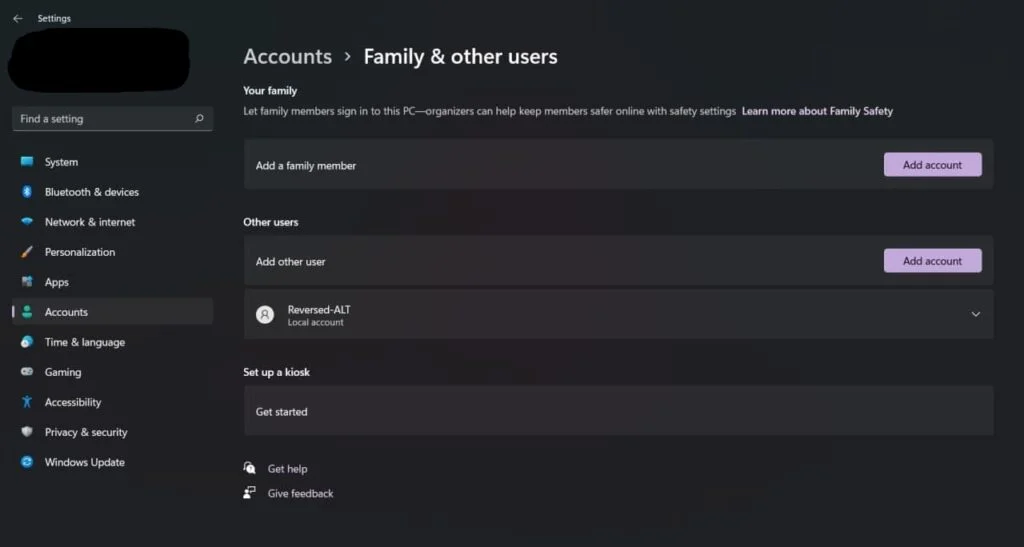
1. First of all open the Settings app and navigate to Accounts> Family & other users.
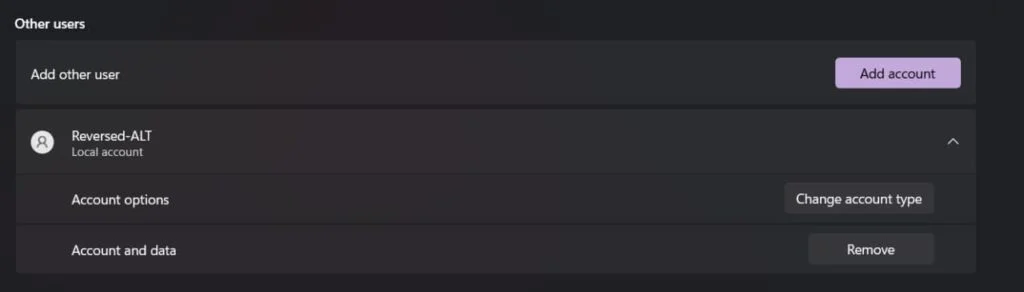
2. After step 1, select the specific user account that you want under the “other users” section.
3. Now click on Change account type on the selected account’s tab.
4. In the next step from the drop-down menu, select “Administrator” account type.
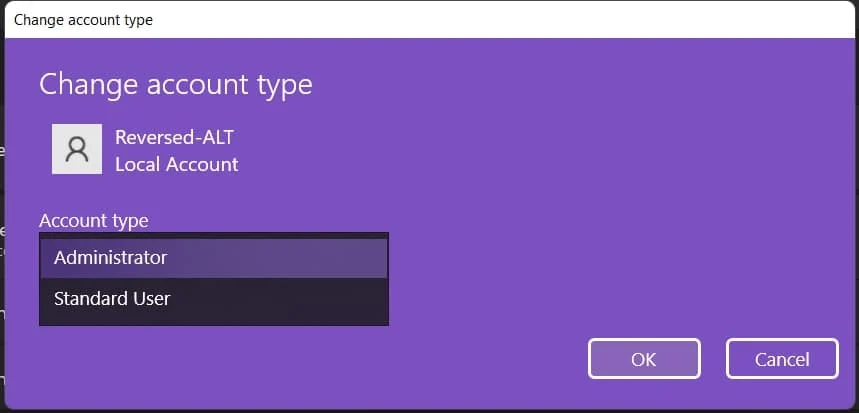
5. You are done, click the OK button.
The above procedure explains how to change administrator options on Windows 11 using the Settings app.
How to Change User Account Using Control Panel in Windows 11?
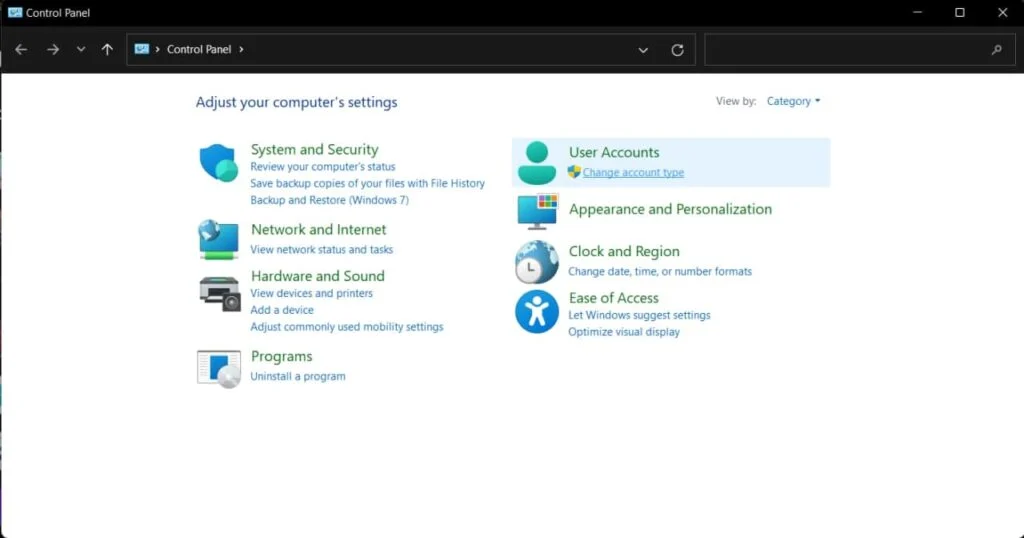
1. First open the Control Panel using Start Menu, or you can use the Windows Key + R, then type “control” and press enter. This will open Control Panel.
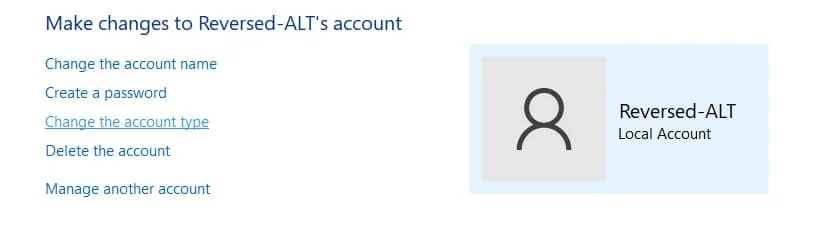
2. You’ll see their “User Accounts” section, under this section select the Change account type option.
3. Now select the account you wish to make administrator from the list.
4. From the left side of the option, select the “Change the account type” option.
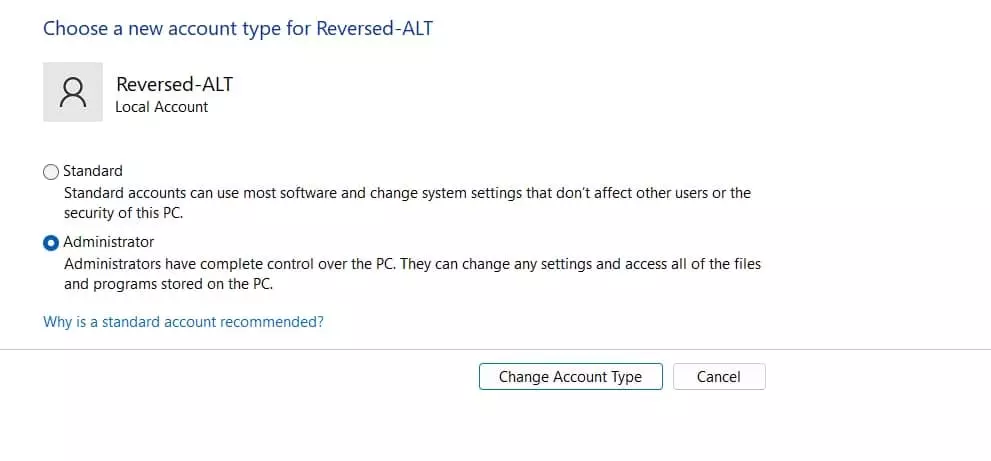
5. You need to choose the “Administrator” from the list of options and click on the “Change Account Type” button.
That’s all, you have successfully learned how to change the administrator on Windows 11.
How to Change Administrator on Windows 10?
The administrator changing method is the same in all the Windows variants from Windows 7 to Windows 11. Check the above-mentioned tutorial that’ll work the same way in other Windows Operating Systems.
Conclusion
If you are the administrator of your Windows computer, then you probably know that you can change your account to another account that you own. You can change your administrator account to another account that you own if you are the administrator of your computer. Otherwise, if you are not the administrator of your computer, you can change your administrator account to another account that you own if you are the administrator of your computer.